I’ve been getting quite a few asks about the process for the patterns in my stylized artworks, so I decided to put together a couple of tips regarding them.
Firstly, what you need are
— CUSTOM BRUSHES —
Most of the patterns I use are custom brushes I made, such as those:
For the longest time I was convinced making brushes must be super extra complicated. I was super extra wrong. All you need to start is a transparent canvas (2500px x 2500px max):
This will be your brush tip. When you’re satisfied how it looks, click Ctrl+A to select the whole canvas and go to ‘define brush preset’ under the edit menu
You will be asked to name your new glorious creation. Choose something that describes it well, so you can easily find it between all the ‘asfsfgdgd’ brushes you’ve created to be only used once
This is it. Look at it, you have just created a photoshop brush. First time i did I felt like I was cheated my whole life. IT’S SO EASY WHY HASN’T ANYONE TOLD ME
Time to edit the Good Boi to be more random, so it can be used as a Cool Fancy Pattern. Go into brush settings and change whatever you’d like. Here’s a list of what I do for patterns:
– under Shape Dynamics, I increase Size Jitter and Angle jitter by 5%-15%
– under Brush Tip Shape, I increase spacing by a shitload. Sometimes it’s like 150%, the point is to get the initial brush tip we painted to be visible.
– If I want it to look random and noisy, I enable the Dual Brush option, which acts like another brush was put on top of the one we’ve created. You can adjust all of the Dual Brush options (Size, Spacing, Scatter, Count) as you wish to get a very nice random brush to smear on your backgrounds
The result is as above. You can follow the same steps to create whatever brush you need: evenly spaced dots that look like you painted them by hand, geometric pattern to fill the background, a line of perfectly drawn XDs and so on.
BUT WAIT, THERE’S MORE
— PATHS —
But what if you want to get lots of circles made of tiny dots? Or you need rows of triangles for your cool background? Photoshop can do all of that for you, thanks to the magic of paths.
Typically, paths window can be found right next to Layers:
Draw whatever path you want, the Shape Tool has quite a bit of options. Remember, paths are completely different from brush strokes and they won’t show up in the navigator. To move a path around, click A to enable path selection tool. You can use Ctrl+T to transform it, and if you move a path while pressing Alt it will be duplicated.
Now, pick a brush you wish really was in place of that path you’ve drawn and go to layers, then choose the layer you want it to be drawn on. Then, click this tiny circle under the Paths window:
Then witness the magic of photoshop doing the drawing for you while you wonder how tf have you managed to forget about this option for the past 2 years
You can combine special brushes and paths for all sorts of cool effects. I mostly use them in backgrounds for my cards, but you can do whatever you want with them.
I hope that answers the questions for all of the people who were sending me inquires about the patterns. If you have any questions regarding this or any other Photoshop matter feel free to message me, I’m always up for complaining about how great and terrible Photoshop is C’:
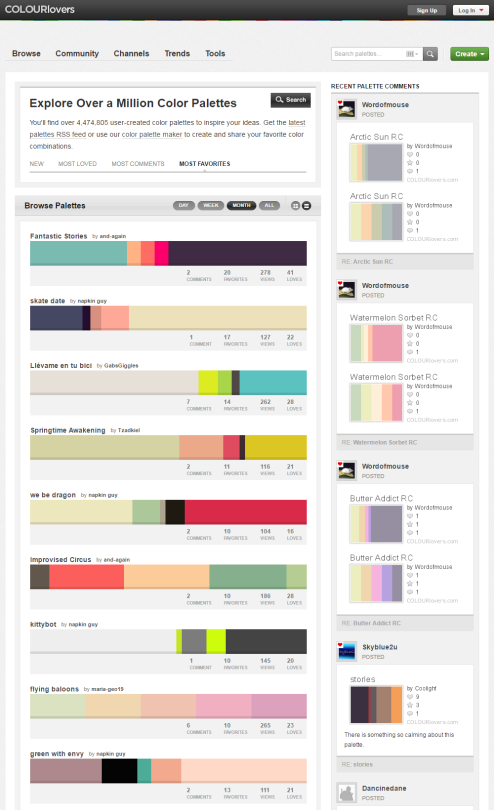
You can browse the most popular ones or search for certain colors, themes, and even specific hex codes!
When you find one you like, you can download a wallpaper swatch of it and also select the specific colors it uses to look at more palettes that use those same ones.
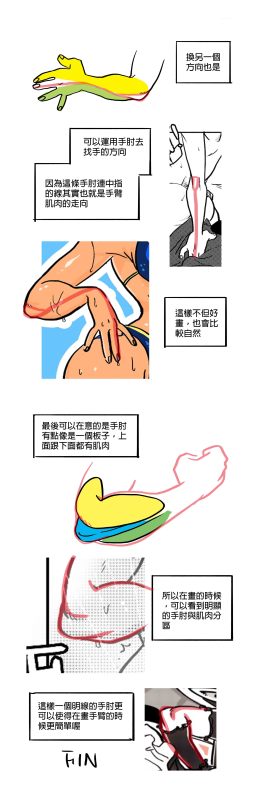
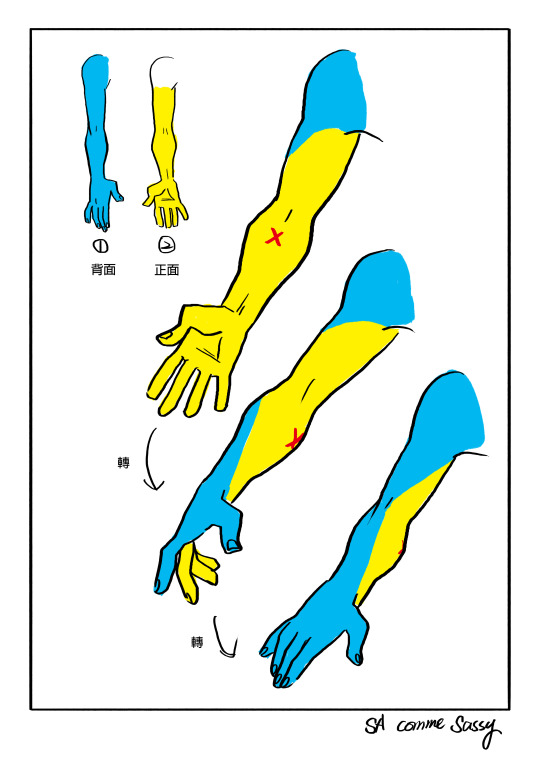
I’ve translated the ones that aren’t in English! (at least the ones in the main photoset, my Chinese isn’t good and I’m too tired from doing those translations to sit and decipher some of the characters that are blurry haha sorry)
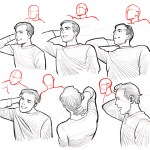
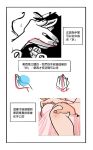
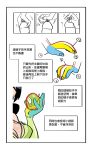
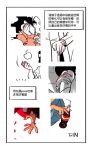
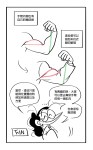
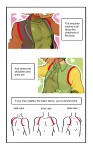
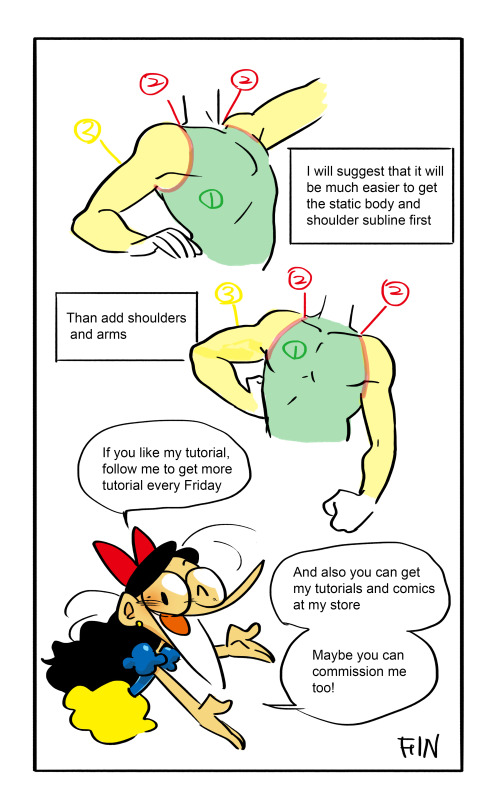
Hi y’all! Folks wanted me to explain how I draw mouths, so here it is! Nothing super complicated, just a really quick and simple demonstration. Another quick note I’d like to add- I’ve always been taught that you should never learn to draw features outside of the face. For example – A lot of young artists will recognize that they need to practice drawing eyes, but then after hours/days/weeks of practicing they find themselves unable to work all this new drawing ability into an actual face. Same thing goes for mouths/noses/brows etc. Get the bulk of the work out of the way on the first attempt! Draw the whole lower half of the face!
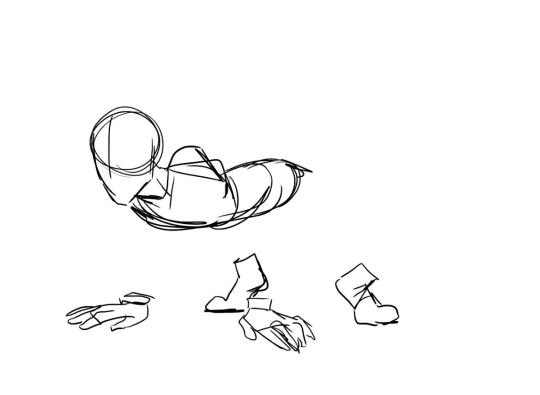
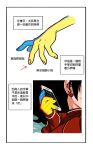
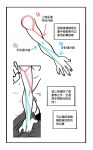
A friend asked me how I draw feet/shoes so I made this quick thing for them on how I breakdown feet when drawing. Thought it might be useful to someone else.
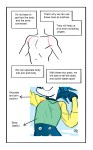
I made a walkthrough of my process for drawing faceted stones! Judging by the timestamps from the screenshots I took, drawing this one stone took an hour and three minutes, although I know I went and checked tumblr a couple times while I was working, so let’s just call it an hour.
Now MISCELLANEOUS NOTES
This walkthrough assumes you already know how to use layer masks, the clone stamp, and the lasso tool. There’s also one part where I didn’t label it, but I inverted the selection so I could keep my lines consistent. It’s in the third image.
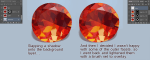
Unfortunately I can’t really help with colour choice and the actual colouring of the pinwheel shape that makes up the back facets, but you can kind of see that I tended to colour with lines that cut across the facets and and kept the outer parts of the facets darker. It would probably be best to find a reference to work from!
This particular cut of stone is called the ‘brilliant’ cut.
There’s actually a lot of internal reflection business that goes on in a stone, but I elected to ingore all of it since at a distance you can’t really tell anyway.
now GO FORTH AND DAZZLE YOUR FRIENDS WITH YOUR SPARKLE